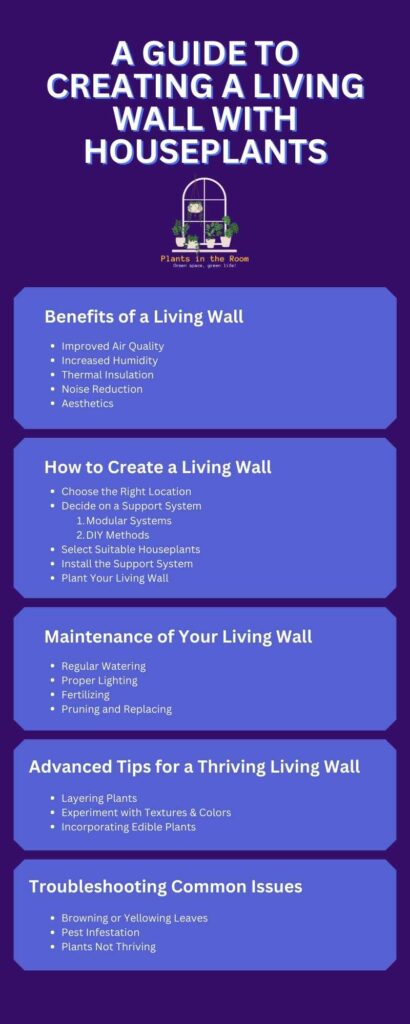
This article covers the following areas –
- What is a Living Wall?
- Benefits of a Living Wall
- How to Create a Living Wall: Step By Step Guide
- Maintenance of Your Living Wall
- Advanced Tips for a Thriving Living Wall
- Troubleshooting Common Issues
- In Conclusion
Living walls, also known as vertical gardens, have grown in popularity due to their aesthetic appeal and eco-friendly benefits. These self-sustainable plant displays can transform any indoor space into a green oasis. In this post, I’ll provide a step-by-step process to create your living wall with houseplants.
Creating a living wall with houseplants involves choosing the right location and the plants, finding and installing the support system, and planting your living wall. Regular maintenance, such as watering, proper lighting, fertilizing, and pruning, is also crucial for a thriving living wall.
Keep reading this guide for a detailed explanation, from choosing the right location and support system to maintaining your living wall for years to come. You’ll also find tips for troubleshooting common issues and advanced techniques for a more impressive living wall.
What is a Living Wall?
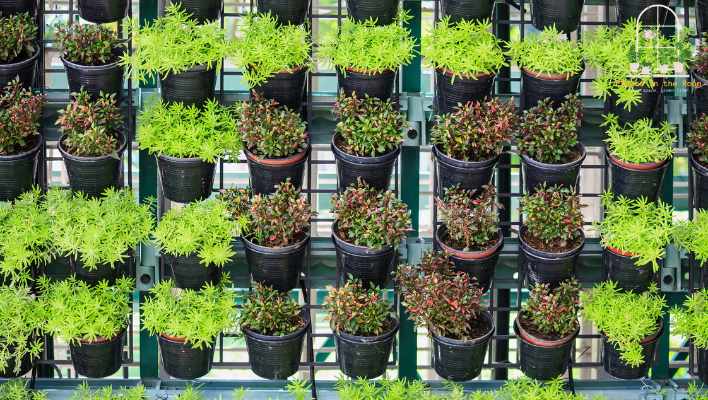
A living wall is a green design element that utilizes various plants to create a lush, vertical surface. This bio-wall is typically built using a lightweight, durable frame that houses plants and their root systems. The choice of plants is vast and depends on factors such as light, temperature, and the maintenance level one can provide.
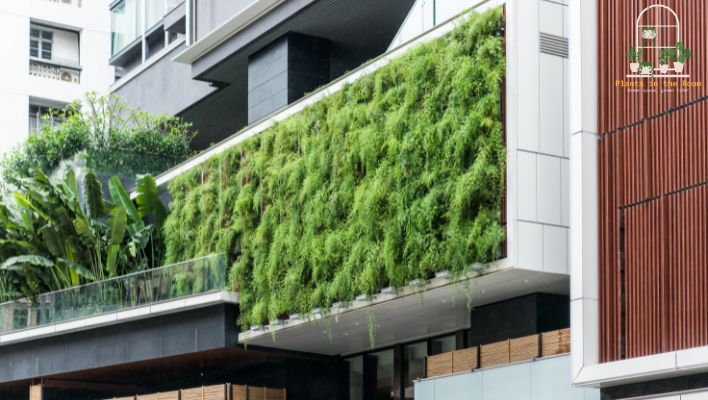
Living walls can be designed for both indoor and outdoor environments, ranging from small, portable setups to large-scale installations covering entire walls. They can be standalone structures or affixed to existing wall surfaces, providing a unique way to incorporate greenery into your living space.
Benefits of a Living Wall
Creating a living wall adds visual interest to your home or workspace and offers a range of environmental and health benefits. In this section, we’ll explore the benefits of a living or vertical wall.
1. Improved Air Quality
Plants are known to purify the air by absorbing harmful toxins found indoors, such as formaldehyde, benzene, and trichloroethylene, through a process called phytoremediation. Through photosynthesis, plants also intake carbon dioxide and release oxygen, enhancing the air’s freshness and oxygen content.
2. Increased Humidity
Indoor air can often be dry, especially in air-conditioned or heated rooms. Plants naturally release moisture into the air through a process called transpiration. In a living wall, the cumulative transpiration from numerous plants can significantly increase a room’s humidity, creating a more comfortable environment, particularly beneficial for skin and respiratory health.
3. Thermal Insulation
Living walls can act as a natural insulation layer for your home. In the summer, the plants and the trapped layer of air in the living wall can help keep your home cooler by absorbing sunlight and heat. Conversely, in the winter, it can help retain warmth, reducing the reliance on artificial heating systems. This thermal insulation can contribute to energy efficiency and potential cost savings on energy bills.
4. Noise Reduction
One of the lesser-known benefits of a living wall is its sound-absorbing capabilities. The plants and their growing medium can dampen sound vibrations and reduce echo, contributing to a quieter, more peaceful environment. This could be especially beneficial in noisy urban settings or open-plan offices.
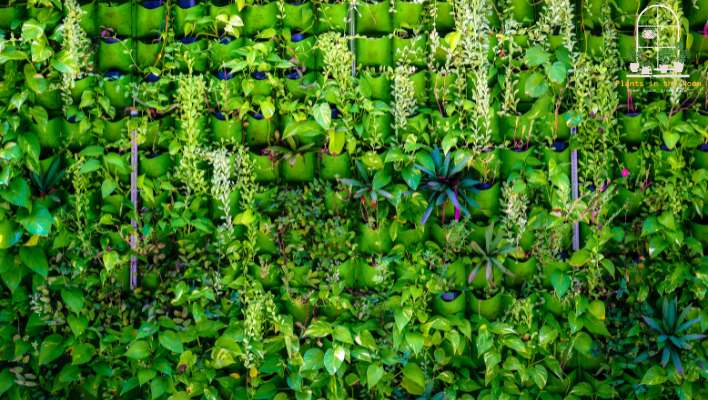
5. Aesthetics
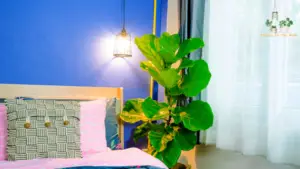
Beyond their practical benefits, living walls are aesthetically pleasing and can transform a space into a verdant haven. They allow you to bring the outdoors inside, adding texture, color, and life to your interiors. Tending to a living wall can be a rewarding hobby, offering a therapeutic connection to nature, even in a city setting.
How to Create a Living Wall: Step By Step Guide
Embarking on the journey to create a living wall can be an exhilarating experience. It allows you to tap into your creative side, foster a deeper connection with nature, and reap the benefits of indoor gardening. Despite the complex appearance of a mature living wall, constructing one is entirely feasible with the right approach and understanding. Here, I provide a step-by-step guide to help you create your own living wall with houseplants.
Step 1: Choose the Right Location
Identifying the perfect spot for your living wall is the first step toward your vertical gardening journey. There are several factors to keep in mind while doing so.
Different plants require different light conditions, ranging from low to bright indirect light. Therefore, identify the types of plants you want to grow and select a location accordingly. As a general rule, an east or west-facing wall near a window is often ideal for most indoor plants.
Watering a living wall can be a little more challenging than watering potted plants. Hence, consider choosing a location near a water source to make watering easier and less messy.
Also, consider the temperature and humidity conditions of the chosen location. Areas close to heating or cooling vents might create harsh conditions for some plants.
The location should be easily accessible for maintenance, pruning, watering, and replacement of plants when needed.
Step 2: Decide on a Support System
Choosing a support system for your living wall will largely depend on your budget, project scale, and DIY skills. Here are two popular options.
1. Modular Systems
These are pre-made panels that you can attach directly to your wall. They are made from a variety of materials like felt, plastic, or metal and often have pockets or cells to place each plant. Many modular systems come with integrated watering facilities, which can simplify maintenance. However, they can be more expensive than DIY solutions.
2. DIY Methods
If you’re handy and looking for a budget-friendly option, DIY methods might be for you. You can use various materials like wood pallets, plastic bottles, or fabric shoe organizers to create your plant pockets. Although this requires more effort, it allows you to customize the living wall to your space and aesthetic preferences.
| Support System Type | Pros | Cons |
|---|---|---|
| Modular Systems | Convenient, often come with built-in irrigation, professional-looking results | Can be expensive, less customizable |
| DIY Methods | Budget-friendly, highly customizable | Requires more effort, may not look as professional, irrigation needs to be manually set up |
Step 3: Select Suitable Houseplants
Choosing the right plants for your living wall is critical to its success. The plants must be aesthetically pleasing and suitable for your chosen location’s specific conditions. Here are a few factors to consider.
- Light Requirements: Plants have different light needs, from low-light tolerant species to those requiring bright, indirect light. Be sure to choose plants that will thrive under your living wall’s light conditions.
- Watering Needs: Some plants prefer consistently moist soil, while others require their soil to dry out between watering. Try to choose plants with similar watering needs to simplify maintenance.
- Temperature and Humidity: Certain plants thrive in cooler environments, while others prefer warmer temperatures. Similarly, some plants prefer high humidity levels, while others are more drought-tolerant. Always consider the ambient temperature and humidity in your chosen location when selecting plants.
- Size and Growth Habits: Consider how much your plants will grow and how quickly. Some plants might outgrow their space on the wall, while others may stay relatively small.
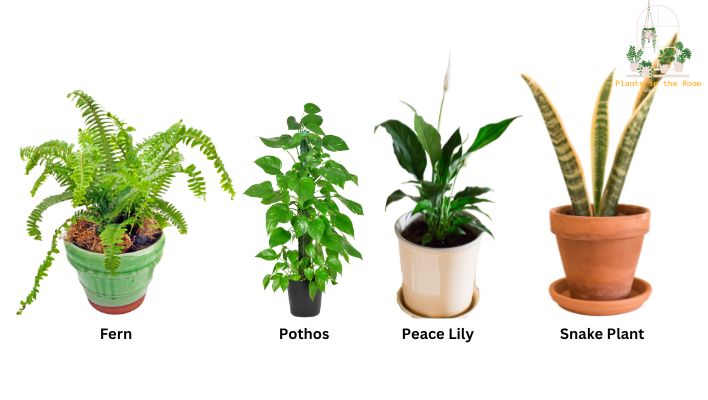
Houseplants popular for living walls due to their hardiness and adaptability include:
- Ferns: These plants are generally adaptable and come in various sizes and shapes. They typically prefer humid environments and indirect light.
- Pothos: These are hardy, vining plants that are known for their low light tolerance.
- Peace Lilies: Known for their beautiful white flowers, these plants can tolerate a range of light conditions.
- Snake Plants: These plants are highly adaptable and can tolerate both low light and drought conditions.
Remember, diversity is the key to a visually appealing living wall, so try to select a mix of plants that provide a variety of textures, colors, and growth habits.
Step 4: Install the Support System
Once you have chosen the right location and selected your plants, installing the support system is time. If you’re using a modular system, follow these steps:
- Mount the Frame: This frame will support the panels where your plants will live. Follow the manufacturer’s instructions to mount it to the wall securely.
- Attach the Panels: You can attach the panels once the frame is in place. These panels may have pockets or cells where you can place each plant.
- Install Irrigation System (if applicable): If your modular system includes a built-in irrigation system, follow the manufacturer’s instructions to install it.
If you’re using a DIY method, like a pallet, follow these steps:
- Prepare the Pallet: If you’re using a wooden pallet, make sure it’s safe for indoor use (i.e., not chemically treated). You may also need to add a back and bottom to the pallet to create pockets for your plants.
- Mount the Pallet: Attach the prepared pallet to your wall, ensuring it’s securely fastened.
- Insert Landscape Fabric: Line the pallet with landscape fabric to prevent soil from spilling out. You can staple the fabric directly to the pallet.
- Add Soil and Plants: Once your pallet is mounted and lined, you can add soil and start planting.
Remember, safety should be your top priority whether you’re using a modular system or a DIY method. Always ensure the wall and support system can handle the weight of the fully planted wall.
Step 5: Plant Your Living Wall
Now that you’ve prepared your location and installed the support system, it’s time to plant your living wall. The process may vary slightly based on the type of support system you’re using, but the following guidelines apply in most cases.
Before you start planting, sketch out a rough plan of where each plant will go. Consider factors like the size of the plant, its growth habit, and its light requirements. This plan can help guide your planting and ensure a balanced, visually appealing result.
Before placing your plants into the wall, ensure they’re healthy and ready for transplant. Remove them from their current pots and gently tease out the roots if they’re root-bound. For most modular systems, you’ll also need to remove excess soil so the plant can fit into the panel’s pockets or cells.
Starting from the bottom and working your way up reduces the risk of damaging lower plants while planting above them. It also makes watering easier, as excess water naturally flows downwards.
According to your design, place the plants into the pockets or cells in your support system. Ensure the plants are secure, but avoid packing them too tightly, which could damage the roots or impede growth.
After all plants are in place, fill any remaining space in the pockets or cells with soil. This helps to support the plants and provides a medium for the roots to grow into.
Once all plants are in place, give the entire wall a good watering. This helps settle the soil and gives your plants a good start in their new environment.
Planting a living wall is a creative process that allows you to design a unique piece of living art. Don’t be afraid to experiment with plant placement, and remember that plants can be moved or replaced as your living wall evolves over time. Patience is key here; it may take time for your living wall to fully fill in and reach its peak lushness, but the result is worth the wait.
Maintenance of Your Living Wall
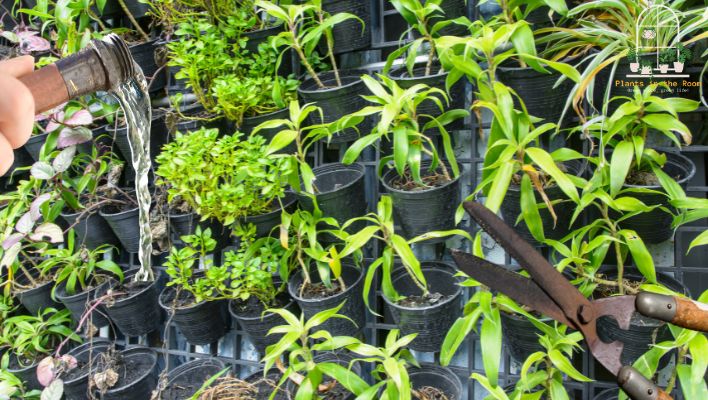
Once your living wall is planted and established, the focus shifts to maintenance. Keeping your living wall healthy and lush involves regular watering, ensuring adequate light, fertilizing, and periodic plant pruning or replacing. Although these tasks require effort and dedication, the joy and satisfaction of nurturing a thriving, beautiful living wall make it well worth the effort.
Regular Watering
Water is the lifeblood of plants, and your living wall is no exception. Providing a consistent water supply to your vertical garden is crucial for optimal growth.
If your living wall system includes built-in irrigation, use this system to water your plants regularly. Some systems allow you to set a timer, automating the process and ensuring consistent watering.
If your living wall doesn’t include irrigation, you’ll need to water it by hand. Watering frequency will depend on the types of plants and the climate in your home, but a good rule of thumb is to water when the top inch of the soil feels dry to the touch.
Remember, overwatering can be as detrimental as underwatering. It’s crucial to understand the water requirements of the plants you’ve chosen for your living wall and adjust accordingly.
Proper Lighting
Lighting is another critical factor in the growth and health of your living wall. Ensure your plants receive the proper amount of light, keeping in mind that different plants have different light requirements.
If your living wall doesn’t receive sufficient natural light, you may need to supplement it with artificial light. Grow lights, which produce a spectrum of light suitable for photosynthesis, can be an excellent solution for lighting your living wall.
Fertilizing
Just like any other garden, your living wall needs nutrients to thrive. Over time, plants use up the nutrients in their soil, so it’s important to replenish these nutrients regularly with fertilizer.
Use a balanced, water-soluble fertilizer for best results. ‘Balanced’ means that the fertilizer contains equal amounts of Nitrogen (N), Phosphorus (P), and Potassium (K), which are the primary nutrients plants need to grow. Follow the package instructions to determine how much fertilizer to use and how often to apply it.
Pruning and Replacing
Regular pruning helps keep your living wall looking its best. Prune to control size, remove dead or diseased foliage, and promote bushier growth. This improves the appearance of your living wall and plant health by increasing air circulation and reducing disease transmission.
Over time, you may also need to replace plants that outgrow their space or don’t thrive in the living wall environment. Having a few extra plants on hand can make this process easier and keep your living wall looking lush and full.
Maintenance is a crucial aspect of owning a living wall, and while it does require effort, the reward of a vibrant and thriving vertical garden makes it worthwhile.
Advanced Tips for a Thriving Living Wall
A living wall can be as simple or as complex as you want it to be. Once you’ve mastered the basics of installation and maintenance, you can explore more advanced techniques to make your living wall even more impressive and unique. Here are some advanced tips that can help elevate your living wall to the next level:
Layering Plants
Layering plants strategically can add a whole new dimension to your living wall. By creating different layers, you add depth, interest, and additional growing conditions for various types of plants. Here’s how you can do it:
- Sun-Loving Plants at the Top: Sun-loving plants can withstand more direct sunlight and usually need brighter light to thrive. Placing these plants at the top of your wall can ensure they get the light they need.
- Shade-Tolerant Plants at the Bottom: Many shade-tolerant plants also appreciate cooler temperatures, often lower on the wall. These plants can benefit from the shade provided by the plants above them.
- Intermediate Light Plants in the Middle: Plants with medium light requirements can go in the middle and receive a balance of light and shade.
Creating these layers allows you to accommodate a wider range of plant species and create a more dynamic and interesting display.
Experiment with Textures and Colors
Your living wall is a piece of living art, and just like any piece of art, it can benefit from contrast and variety. Here are a couple of ways to achieve this:
- Texture: Try incorporating plants with different leaf textures. Broad, glossy leaves can contrast beautifully with fine, feathery foliage. Succulents can be bold and sculptural, while trailing plants add softness and movement.
- Color: Don’t be afraid to play with color. While most houseplants are green, many have variegated foliage, different shades of green, or even other colors like red, purple, or silver. Blooming plants can also add pops of color.
Mixing different textures and colors allows you to create a living wall that’s vibrant, healthy, and visually captivating.
Incorporating Edible Plants
While a living wall is typically seen as a decorative element, it can also be practical. By incorporating edible plants, your living wall can become a source of fresh, homegrown food. Here’s how.
Many herbs are small enough to fit in a living wall and are quite hardy. Examples include basil, mint, rosemary, and thyme. Some salad greens or small fruiting plants, like strawberries, could also work.
Edible plants often require plenty of light, so ensure your wall is in a location where these plants will thrive. Remember to place edible plants where they can be easily accessed for regular harvesting.
By incorporating edible plants, your living wall becomes a beautiful, productive space, adding even more benefits to this already rewarding project.
Troubleshooting Common Issues
While maintaining a living wall can be rewarding, like all gardening endeavors, it can come with its fair share of challenges. Sometimes, despite our best efforts, problems may arise. However, don’t be disheartened. Most common issues can be addressed with a bit of knowledge and care. Let’s explore some of the most common problems you might face with your living wall and how to solve them:
Browning or Yellowing Leaves
If you notice the leaves on your plants starting to brown or yellow, it may be an indication of a few possible issues:
- Overwatering or Underwatering: Plants react to too much and too little water by yellowing or browning leaves. If the leaves are yellow and soft or if there’s mold growth, you’re likely overwatering. If the leaves are brown and crispy, you might be underwatering. Adjust your watering schedule accordingly.
- Lack of Nutrients: Nutrient deficiencies can also cause leaf discoloration. If adjusting watering doesn’t help, consider adding a balanced, water-soluble fertilizer to your plant care routine.
Pest Infestation
Indoor plants aren’t immune to pests. Aphids, spider mites, and mealybugs can all infest houseplants. If you notice small bugs, webbing, or sticky residue on your plants, you likely have a pest problem.
To address this, treat affected plants with an insecticidal soap, which is safe for most indoor plants and effective against a range of pests. Natural methods like neem oil or introducing beneficial insects can also be effective. Also, you should Isolate the infested plants to prevent pests from spreading to other plants in your living wall.
Plants Not Thriving
If your plants aren’t thriving despite proper watering and care, they might not be getting the right amount of light.
To resolve this, if possible, consider moving your living wall to a brighter location. If moving isn’t an option, consider adding grow lights to supplement the natural light.
Remember, troubleshooting issues in a living wall involves observing your plants closely, identifying the problem, and then taking corrective measures. With time and practice, you’ll become adept at understanding what your living wall needs to stay healthy and vibrant.
In Conclusion
A living wall can bring nature inside, providing both aesthetic appeal and health benefits. Creating and maintaining a living wall requires careful planning and regular care, but the rewards are truly worthwhile. With patience and persistence, you can create a thriving living wall that enhances your space and well-being.
Remember, the key to a successful living wall is starting with a clear plan, choosing the right plants and support system, providing proper care, and being willing to adapt and adjust as your living wall grows and evolves. Whether you’re a seasoned green thumb or a beginner plant enthusiast, you can create a beautiful, thriving living wall with houseplants. Happy planting!