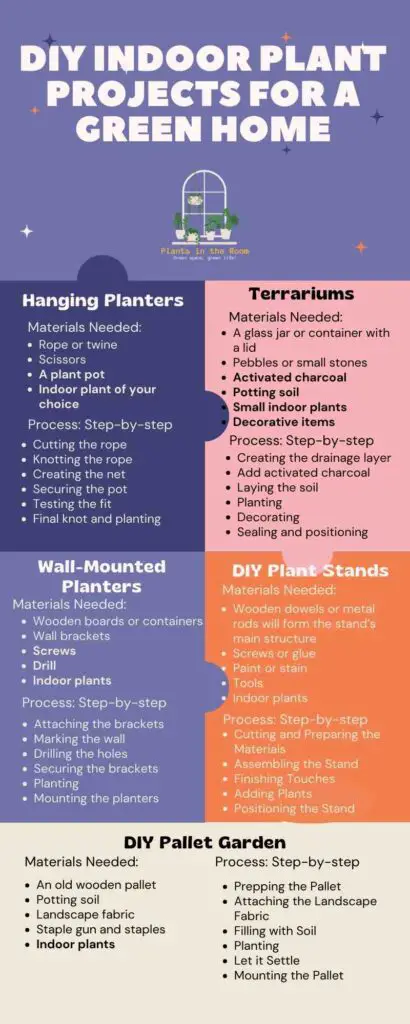
This article covers the following areas –
- 1. Hanging Planters
- 2. Terrariums
- 3. Wall-Mounted Planters
- 4. DIY Plant Stands
- 5. DIY Pallet Garden
- Essential & Practical Plant Care Tips
- In Conclusion
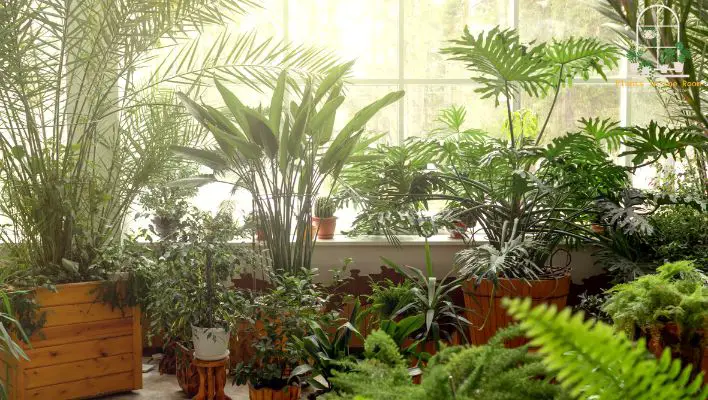
Greenery can transform any space into a vibrant, welcoming environment. There’s something incredibly calming about being surrounded by plants, especially in our indoor spaces. In this post, I’ll guide you through various DIY indoor plant projects that can help you create a green home.
DIY indoor plant projects include hanging planters, terrariums, wall-mounted planters, DIY plant stands, pallet gardens, etc. These projects add greenery and uniqueness to your space, using materials often found around the house.
Keep reading to learn the step-by-step guide to learn about these projects. Also, the latter part of the post will provide you with some valuable tips to make these projects successful.
1. Hanging Planters
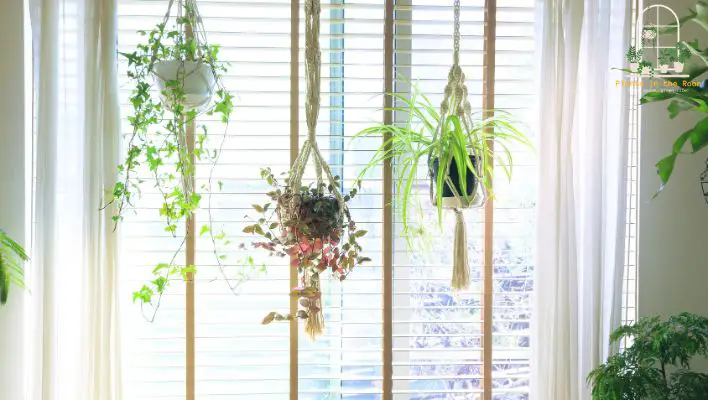
Hanging planters offer a fun and creative way to display indoor plants. They are ideal for those with limited space, as they take advantage of vertical areas. Moreover, they bring a charming and organic element to the home’s interior. This project focuses on creating a simple yet stunning hanging planter using rope or twine. Let’s take a look at the required materials and step-by-step process.
Materials Needed
In any DIY project, gathering the right materials is the first step. For our hanging planter, we need the following:
- Rope or twine: This forms the main structure of the hanging planter. You can choose from a variety of materials like cotton, jute, or nylon, depending on your aesthetic preference.
- Scissors: A good pair of scissors is essential for cutting the rope or twine to the desired length.
- A plant pot: Any pot that can hold your chosen plant will work. Choose one that complements your interior decor.
- Indoor plant of your choice: Choose a plant that thrives in indoor conditions. Due to their cascading growth habit, spider plants, pothos, and ferns are good options for hanging planters.
Process: Step-by-step
Creating a hanging planter involves a series of knotting and securing the plant pot with ropes. It might sound tricky, but it’s relatively straightforward once you get the hang of it. Here’s the step-by-step process:
- Cutting the rope: Start by cutting four pieces of rope or twine, each about twice the length you want your planter to hang. The extra length is necessary to accommodate the knots.
- Knotting the rope: Gather the cut ropes together and tie a knot at one end, leaving some tassels for aesthetic appeal. This knot serves as the base of your hanging planter.
- Creating the net: Divide the ropes into four pairs. Knot each pair about a third of the way down from the base knot. This will form the ‘net’ that holds the pot.
- Securing the pot: Next, take one rope from two adjacent pairs and tie them together. Repeat this all around, and you’ll see a web-like structure forming.
- Testing the fit: Before proceeding, place your pot into the web of ropes to ensure a secure fit. You might need to adjust the knots to get it just right.
- Final knot and planting: Once you’re satisfied with the fit, tie a final knot at the top, ensuring that the pot is held securely. Now, plant your chosen indoor plant into the pot, water it lightly, and you’ve just created a DIY hanging planter.
You can transform simple materials into a beautiful indoor display with some creativity and effort. Hanging planters save floor space and add an extra dimension to your room, making your home feel more vibrant and lively. Plus, they make for great conversation starters!
2. Terrariums

A terrarium is a fascinating blend of gardening, art, and science. It allows you to create a miniature landscape within a controlled environment, which can be an excellent way to understand the ecosystem’s workings. While they may look complex, terrariums are surprisingly easy to create. All you need are a few specific materials and the knowledge of layering them correctly.
Materials Needed
Building a terrarium doesn’t require a massive investment. Here’s a list of materials that you’ll need to create a thriving mini-garden:
- A glass jar or container with a lid: This forms the ‘home’ for your terrarium. You can choose a container that suits your style – an old mason jar, a clear glass vase, or even a unique container designed specifically for terrariums.
- Pebbles or small stones: These create the bottom layer of the terrarium and act as a drainage system for excess water.
- Activated charcoal: A layer of activated charcoal keeps the terrarium fresh by filtering the air and preventing mold growth.
- Potting soil: This serves as the bed for your plants to grow. Make sure to choose soil suitable for indoor plants.
- Small indoor plants: Choose small plants that thrive in a humid, low-light environment, like mosses, ferns, and succulents.
- Decorative items (optional): Personalize your terrarium with miniature figurines, shells, colored stones, or anything else that fits your theme.
Process: Step-by-step
Constructing a terrarium is about layering the right materials in order. Here’s a step-by-step guide:
- Creating the drainage layer: Start by adding a layer of pebbles or small stones to the bottom of your container. This layer provides essential drainage and prevents water from sitting in the soil, which can lead to root rot.
- Add activated charcoal: Sprinkle a thin layer of charcoal over the pebbles. This charcoal helps to filter the air within the terrarium and keep it fresh.
- Laying the soil: Add a generous layer of potting soil on top of the charcoal. Make sure it’s deep enough to accommodate the roots of your chosen plants.
- Planting: Now, it’s time to add your plants. Dig small holes in the soil and carefully place your plants inside. Compact the soil around the base of each plant to keep them secure.
- Decorating: If desired, add any decorative items to give your terrarium a personalized touch.
- Sealing and positioning: Close the lid to create a self-sustaining mini-ecosystem. Place your terrarium in a spot that receives plenty of indirect sunlight, and remember to water sparingly.
Building a terrarium offers an opportunity to design and create a small ecosystem that can last for years with minimal care. This project is a great way to add a little bit of green to your living space and express your creativity.
3. Wall-Mounted Planters

Wall-mounted planters are a fantastic way to inject greenery into your home without taking up floor space. They’re particularly effective if you live in an apartment or a house with limited space. The best part about wall-mounted planters is that they are extremely versatile. You can arrange them in a cluster for a mini vertical garden or hang them individually for a minimalist look. Let’s start with the materials you’ll need and then move on to the process.
Materials Needed
Creating wall-mounted planters requires a few basic materials and tools. Here’s what you’ll need:
- Wooden boards or containers: These will hold your plants. You can choose wooden boards for a rustic look or modern containers for a more contemporary style.
- Wall brackets: These support the boards or containers on the wall. They come in various sizes and styles, so choose something that complements your decor.
- Screws: You’ll need screws to secure the brackets to the wall and attach them to your boards or containers.
- Drill: A drill is necessary to make holes in your wall where the planters will hang.
- Indoor plants: The stars of the show! Choose plants that thrive indoors and suit the size of your chosen containers.
Process: Step-by-step
Once you have gathered all your materials, you can start assembling your wall-mounted planters. Here’s how:
- Attaching the brackets: Start by attaching the brackets to your wooden boards or containers using the screws. Make sure they are firmly secured and able to support the weight of the filled containers.
- Marking the wall: Decide where you want your planters to hang on the wall. Use a pencil to mark the points where the brackets will be fixed.
- Drilling the holes: Using a drill, create holes at the marked points. It’s important to ensure the holes align with the brackets on your planters.
- Securing the brackets: Now, fix the brackets into the drilled holes using screws. Ensure they’re securely mounted before proceeding.
- Planting: Fill your containers with your chosen plants. Ensure that they are well settled in the soil.
- Mounting the planters: Carefully place your filled containers onto the wall brackets. Make sure they’re secure, and then step back to admire your new wall-mounted planters!
Creating DIY wall-mounted planters can transform any wall into a vibrant living canvas. This is a fun, practical project that offers endless creative possibilities. Not only will your indoor plants get a new home, but your walls will also get a green makeover.
4. DIY Plant Stands
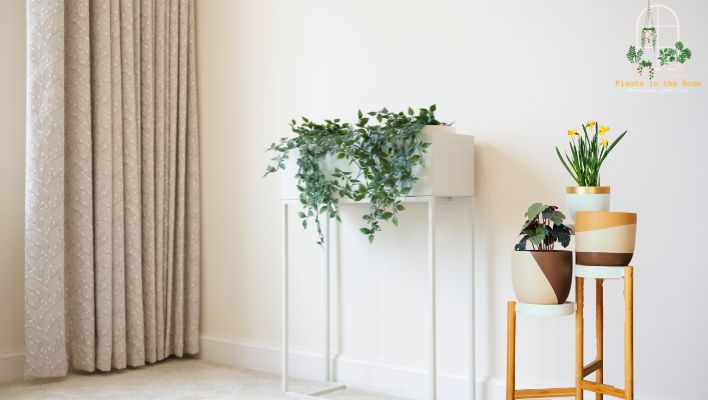
A DIY plant stand is a wonderful way to enhance the beauty of your indoor plants while adding a personal touch to your decor. This project is relatively easy to accomplish and extremely satisfying as you create a custom piece of furniture for your green friends. Let’s start with the list of materials you’ll need and then delve into the process of making your plant stand.
Materials Needed
To start with your DIY plant stand project, you will need the following:
- Wooden dowels or metal rods will form the stand’s main structure. The choice of material depends on your design preference and the weight of the plants you intend to display.
- Screws or glue: Depending on your design, you may need screws to assemble the stand or wood glue for a more seamless look.
- Paint or stain (optional): If you want to customize the color of your stand, have some paint or wood stain handy.
- Tools: Basic tools like a saw (if you need to cut your dowels or rods), a drill, and a screwdriver will be necessary.
- Indoor plants: Choose plants that will look great on the stand. Varying the plants’ height, texture, and color can create an interesting display.
Process: Step-by-step
Once you have all your materials, you’re ready to get started on your DIY plant stand. Here’s a simple process you can follow:
- Cutting and Preparing the Materials: Cut your dowels or rods to the desired length if necessary. Sand them if required and apply your chosen paint or stain. Let them dry thoroughly.
- Assembling the Stand: Depending on your design, you might want to create a ladder-like or tiered stand. Join the dowels or rods together using screws or wood glue to form the desired shape. Make sure the structure is sturdy and balanced.
- Finishing Touches: Once your stand is assembled, you may want to add another coat of paint or sealant to give it a finished look. Make sure the stand is fully dry before proceeding.
- Adding Plants: Now for the fun part – adding your plants! Arrange your plants on the stand, taking into consideration the weight distribution and the visual balance.
- Positioning the Stand: Finally, place your stand in a spot where the plants will receive the right amount of light. And there you have it – your very own DIY plant stand!
Creating a DIY plant stand is an excellent project to express your creativity and love for plants. It allows you to display your indoor plants uniquely, enhancing your home’s aesthetic appeal. Plus, it’s a great conversation starter when guests come over. So why wait? Grab your tools and start creating your personalized plant stand!
5. DIY Pallet Garden
Creating a DIY Pallet Garden is an innovative and environmentally friendly way to showcase your indoor plants. This project is perfect for those who enjoy crafting and have a flair for thinking outside the box. With a bit of creativity and effort, you can create a beautiful vertical garden within the confines of your home.
Materials Needed
For this engaging DIY project, you will need the following:
- An old wooden pallet: Make sure it’s in good condition. You may need to sand or paint it to fit your decor.
- Potting soil: This is essential for planting your plants in the pallet.
- Landscape fabric: This will hold the soil in place and prevent it from falling out when the pallet is vertical.
- Staple gun and staples: This is for attaching the landscape fabric to the pallet.
- Indoor plants: Choose various plants with similar light and water requirements. Succulents, ferns, or small flowering plants can work well.
Process: Step-by-step
To create your DIY Pallet Garden, follow these steps:
- Prepping the Pallet: Start by sanding down any rough patches on your pallet. If you wish, you can paint or stain the pallet to match your interior decor.
- Attaching the Landscape Fabric: Lay your pallet flat and roll out your landscape fabric over the back. Make sure to cover the sides and bottom as well. Use your staple gun to secure the fabric in place. This creates a pocket to hold the soil.
- Filling with Soil: With the pallet still flat, fill the slats with potting soil.
- Planting: Begin planting your chosen plants in the slats. Try to create a visually pleasing arrangement by mixing different textures, heights, and colors.
- Let it Settle: Allow your pallet garden to remain horizontal for a couple of weeks. This gives the plants time to root and makes them less likely to fall out when the pallet is placed vertically.
- Mounting the Pallet: Finally, choose a suitable spot for your pallet garden, making sure it receives the appropriate amount of sunlight for your chosen plants. Mount it securely, and you have a stunning vertical indoor garden!
A DIY Pallet Garden can transform your indoor space into a cozy, green haven. This project allows you to reuse old pallets and provides an eye-catching way to display your plants.
Essential & Practical Plant Care Tips
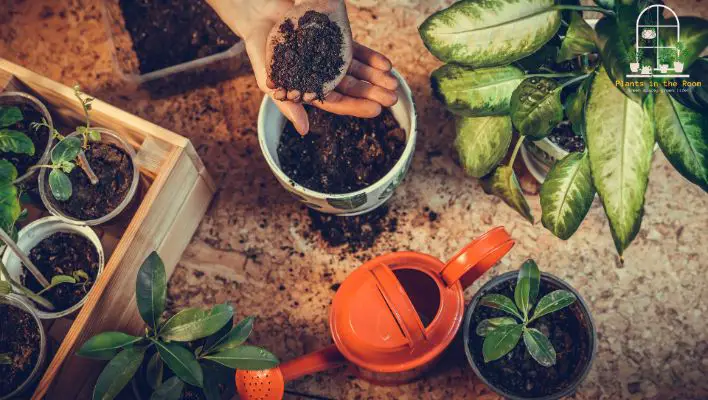
The proper care of your indoor plants is just as important as the aesthetic appeal of your DIY projects. Without adequate care, even the most striking plants can wither away. On the other hand, when well-cared for, your indoor plants can enhance your home’s overall look and feel and serve as a source of joy and satisfaction. Let’s explore some essential plant care tips to help your indoor greenery flourish.
1. Watering
Plants need water, but the frequency and amount can vary greatly between different types. The golden rule for most indoor plants is to water when the top inch of soil is dry to the touch. Overwatering can lead to root rot, a common plant killer. Remember that it’s always better to be underwater than overwater.
2. Sunlight
Another critical aspect of indoor plant care is ensuring they receive adequate light. However, keep in mind that few indoor plants can tolerate direct sunlight. Place your plants near windows where they can get plenty of indirect light. If you see leaves turning yellow or the plant leaning toward the light source, it might be a sign that the plant needs more light.
3. Rotation
Plants tend to grow towards their light source, which can result in them growing unevenly. To prevent this, rotate your plants every few weeks to ensure that they get light from all angles and grow evenly.
4. Pruning
Regular pruning helps to maintain a plant’s shape, removes dead or diseased parts, and encourages the plant to develop more branches. Don’t be afraid to trim your plants when they look a little overgrown. Remember, a happy plant is a healthy plant!
5. Temperature
Indoor plants typically prefer temperatures between 65 and 75 degrees Fahrenheit. Avoid placing them near heat vents or drafty windows to prevent shock from temperature swings.
6. Humidity
Some plants, especially tropical ones, thrive in a humid environment. If you live in a dry area, you can boost humidity levels by placing a tray of water near your plants, misting them lightly, or using a humidifier.
Taking care of indoor plants can be a therapeutic activity, and it’s also highly rewarding. With these tips, you’ll be well on your way to maintaining a green, lively, and attractive indoor space.
In Conclusion
Taking on DIY Indoor Plant Projects is a fulfilling journey, transforming your living space into a green, serene, and lively environment. The simple act of creating and caring for these projects can significantly impact your well-being, serving as an oasis of calm in our hectic lives.
From hanging planters to pallet gardens, each project we’ve covered brings a unique aesthetic appeal and presents an opportunity to put your personal touch on your home decor. Additionally, these projects contribute to sustainable living and environmental conservation by reusing materials like old wooden pallets or glass jars.
As we’ve discussed, the care of your indoor plants is just as important as the beauty of your DIY projects. Proper watering, sunlight, rotation, pruning, temperature, and humidity control are crucial in maintaining the health of your plants. After all, a well-tended indoor garden is a symbol of love and attention.