This article covers the following areas –
- Selecting the Right Indoor Bromeliad
- How to Perfectly Plant Bromeliads?
- Watering Technique Tips for Your Bromeliad
- Feeding Your Indoor Bromeliad to Grow Healthy
- Tips to Pruning and Grooming Your Indoor Bromeliad
- Propagation Process of Your Indoor Bromeliad
- How to Control Humidity for Your Bromeliad?
- Common Pests and Problems
- In Conclusion
- Get to Know Your Bromeliad
As an indoor plant enthusiast, I’ve always been interested in unique and eye-catching plants like bromeliads. With their striking colors, exotic shapes, and low-maintenance requirements, indoor bromeliads are a perfect addition to any home. In this post, I’ll share my experiences and tips to help you keep your bromeliads looking their best. So, let’s get started!
For indoor bromeliad care, ensure proper light, maintain temperature and humidity levels, use a well-draining mix, fill the central “tank” with water, fertilize once a month, remove dead leaves, and propagate through pups.
There are different factors that you must know in detail to ensure proper care and maintenance for your bromeliad. Keep reading to learn everything about bromeliad care.
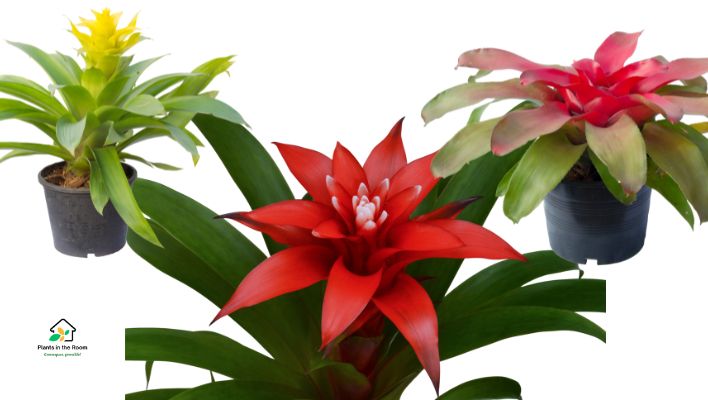
Selecting the Right Indoor Bromeliad
When choosing a bromeliad for your indoor space, consider factors like light, temperature, and humidity. Different species have varying requirements, so make sure to research your chosen bromeliad for optimal growth.
| Bromeliad Species | Light Requirements | Temperature Range (Day) | Temperature Range (Night) | Preferred Humidity Level |
|---|---|---|---|---|
| 1. Vriesea 2. Guzmania | Low light (filtered or indirect sunlight) | 70-80°F (21-27°C) | 60-65°F (16-18°C) | 40-60% |
| 1. Neoregelia, 2. Aechmea | Medium light (bright but indirect sunlight) | 70-80°F (21-27°C) | 60-65°F (16-18°C) | 40-60% |
| 1. Tillandsia | High light (bright, indirect light) | 70-80°F (21-27°C) | 60-65°F (16-18°C) | 40-60% |
How to Perfectly Plant Bromeliads?

Bromeliads are unique plants, as many of them are epiphytic, which means they don’t rely on soil for their growth. Instead, they attach themselves to other plants, rocks, or structures and absorb nutrients and water through their leaves. This characteristic makes them versatile and low-maintenance plants for your indoor space.
When planting your indoor bromeliad, it’s essential to use a well-draining mix that mimics their natural habitat and provides adequate air circulation for the roots. A suitable mix consists of:
- 50% bark or coconut coir
- 25% perlite
- 25% peat moss
To plant your indoor bromeliad, follow these steps:
- Choose a container with drainage holes to prevent water accumulation and root rot. Pick a pot that’s slightly larger than the root ball of your bromeliad.
- Add a layer of the well-draining mix to the bottom of the container.
- Gently remove the bromeliad from its original pot, taking care not to damage the roots.
- Position the bromeliad in the center of the new container and spread the roots out evenly.
- Fill the container with the remaining mix, ensuring that the base of the plant is at the same level as it was in its original pot. Press the mix lightly around the roots to secure the plant.
- Water the bromeliad thoroughly to settle the mix and eliminate any air pockets.
Watering Technique Tips for Your Bromeliad
Proper watering is crucial for the health and well-being of your indoor bromeliad. These unique plants have a central “tank” or “cup” created by overlapping leaves that forms a reservoir for water storage. This tank allows the bromeliad to absorb water and nutrients directly through its leaves, making watering easy and straightforward.
Tip 1: Use Room Temperature Water
Bromeliads are sensitive to extreme temperatures, so using water that is too hot or too cold can cause damage to the plant. Room temperature water is ideal.
Tip 2: Fill the Central Tank
Slowly pour water into the tank, filling it until it reaches the brim. Be careful not to splash water on the surrounding surfaces, as bromeliad leaves can be sensitive to water spots. You can use a small watering can with a long spout or a turkey baster for precision watering.
Tip 3: Allow Water to Flow Down the Leaves
As you fill the tank, water will naturally flow down the leaves and reach the roots. This process mimics how bromeliads absorb water in their natural habitat.
Tip 4: Empty and Refill the Tank Weekly
To prevent the buildup of bacteria, mold, and debris in the tank, it’s essential to empty and refill it with fresh water every week. To do this, gently tip the plant over a sink, allowing the old water to drain out. Then, refill the tank with fresh room-temperature water.
Tip 5: Water the Potting Mix Sparingly
Although bromeliads primarily absorb water through their leaves, it’s also essential to keep the potting mix slightly moist. Water the mix lightly every couple of weeks, ensuring it doesn’t become waterlogged. This will help maintain a healthy root system.
Tip 6: Monitor the Plant’s Health
Keep an eye on your bromeliad’s leaves to determine if it’s receiving adequate water. If the leaves appear wilted or start to turn brown, your plant may need more water. On the other hand, if the leaves become soft and mushy or show signs of rot, you may be overwatering.
By following these watering tips, you’ll create an ideal environment for your bromeliad to flourish. Remember that different bromeliad species may have varying water requirements, so always research your specific plant to ensure you’re providing the best care possible.
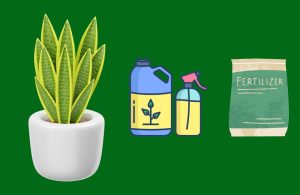
Feeding Your Indoor Bromeliad to Grow Healthy
Although bromeliads are not heavy feeders, providing them with the right nutrients can encourage healthy growth and vibrant foliage. Feeding your indoor bromeliad with a balanced liquid fertilizer can make a difference in its overall appearance and well-being. Here is the process of feeding your bromeliad.
Step 1: Choose the Right Fertilizer
Select a balanced liquid fertilizer with equal parts nitrogen (N), phosphorus (P), and potassium (K), such as a 20-20-20 or 10-10-10 formula. These nutrients support overall plant health, leaf growth, and flowering.
Step 2: Dilute the Fertilizer
Bromeliads are sensitive to high nutrient concentrations, so it’s crucial to dilute the fertilizer to half-strength before application. Follow the manufacturer’s instructions for the recommended dilution, and then reduce it by half. For example, if the instructions suggest mixing 1 tablespoon of fertilizer per gallon of water, use only 1/2 tablespoon per gallon.
Step 3: Apply the Fertilizer
During the growing season, which typically occurs from spring through early fall, apply the diluted fertilizer once a month. Gently pour the liquid fertilizer over the potting mix at the base of the plant, being careful to avoid the central tank. Fertilizer in the tank can cause leaf burn and negatively affect the plant’s overall health.
Step 4: Monitor Your Bromeliad’s Response
Keep an eye on your plant after feeding it to ensure it’s responding well to the fertilizer. If you notice any signs of nutrient burn, such as brown or yellow leaf tips, reduce the frequency or dilution of your fertilizer applications.
Step 5: Adjust the Feeding Schedule
In late fall and winter, when the plant’s growth slows, reduce the feeding frequency to once every two months or stop fertilizing altogether. Resume the monthly feeding schedule when new growth appears in the spring.
Tips to Pruning and Grooming Your Indoor Bromeliad
Regular pruning and grooming of your indoor bromeliad is essential for maintaining its aesthetic appeal and overall health. By removing dead or yellowing leaves and spent blooms, you can prevent the spread of disease and encourage new growth. Here are some tips on how to prune and groom your indoor bromeliad:
Tip 1:
Equip yourself with clean, sharp scissors or pruning shears for a precise and clean cut. Ensure your tools are sterilized before use to avoid introducing any pathogens to your plant.
Tip 2:
Inspect your bromeliad regularly for any leaves that appear dead, yellow, or damaged. To remove them, cut the leaf at its base, close to the main stem, without damaging the healthy surrounding leaves. Discard the removed leaves in a compost bin or trash.
Tip 3:
After your bromeliad has flowered, the bloom will eventually start to fade and die. Cut the spent bloom off at its base, close to where it meets the plant’s central stem. This will encourage the plant to produce new growth and may also stimulate the development of pups or offsets.
Tip 4:
Keep your bromeliad looking its best by removing any debris, such as fallen leaves or dust, from the central tank and leaf surfaces. Use a soft, damp cloth or a gentle stream of water to clean the leaves, ensuring that you don’t damage them in the process.
Tip 5:
As you prune and groom your bromeliad, take the opportunity to inspect the plant for signs of pests, such as mealybugs, spider mites, or scale insects. If you find any, treat the infestation promptly to prevent further damage. Also, check for signs of disease, such as black spots, leaf discoloration, or rotting roots.
Propagation Process of Your Indoor Bromeliad

Bromeliad propagation is an exciting and rewarding process that allows you to expand your plant collection or share it with friends and family. Bromeliads produce pups, also known as offshoots or offsets, which can be separated and grown into new plants. Here’s a step-by-step guide to propagating your indoor bromeliad.
Step 1: Identify the Pups
Look for small offshoots growing around the base of the mother plant. These pups should have their own root system and leaves. Ensure the pup is healthy and well-developed before attempting to remove it.
Step 2: Wait for the Right Size
It’s essential to wait until the pup is at least one-third the size of the mother plant before removing it. This will ensure the pup has a better chance of surviving on its own.
Step 3: Prepare Your Tools
Gather a clean, sharp knife or pair of scissors and sterilize them before use. This will prevent the spread of disease or infection during the propagation process.
Step 4: Separate the Pup
Carefully cut the pup away from the mother plant, making sure to include some roots. If the pup is firmly attached, you may need to wiggle it gently back and forth to loosen the connection before cutting.
Step 5: Let the Pup Dry
Place the separated pup in a cool, shaded area for a few hours or up to a day. This will allow the cut to dry and form a protective callus, reducing the risk of rot or infection.
Step 6: Prepare the Potting Mix
Use the same planting mix as the mother plant, which typically consists of 50% bark or coconut coir, 25% perlite, and 25% peat moss. This well-draining mix will provide the pup with the ideal growing environment.
Step 7: Plant the Pup
Choose an appropriately sized container with drainage holes and fill it with the potting mix. Make a small hole in the center and gently place the pup’s roots into it. Firmly press the potting mix around the base of the pup, ensuring it is securely anchored.
Step 8: Care for the New Plant
Place the newly potted pup in a location with similar light, temperature, and humidity conditions as the mother plant. Water it sparingly for the first few weeks to avoid overwatering and root rot. Gradually increase watering as the pup establishes itself and starts to grow.
Step 9: Monitor growth
Keep an eye on your new bromeliad pup, ensuring it receives adequate care and attention. It may take some time for the pup to acclimate and begin showing significant growth. Be patient, and eventually, your propagated bromeliad will flourish.
By following these steps, you can successfully propagate your indoor bromeliad and enjoy the satisfaction of nurturing new plants. With time and care, your bromeliad collection will continue to grow and provide you with a stunning indoor display.
How to Control Humidity for Your Bromeliad?
Indoor bromeliads are native to tropical environments, making them well-adapted to thrive in moderate to high humidity levels. To keep your bromeliad healthy and promote optimal growth, aim to maintain a humidity level between 40-60%. Here are some methods to help you achieve the desired humidity for your indoor bromeliad.
Method 1: Use a Humidifier
Place a humidifier close to your bromeliad to increase the humidity in its immediate vicinity. Humidifiers come in various sizes and types, so choose one that suits your needs and space. Be sure to monitor and adjust the settings to maintain the target humidity level.
Method 2: Create a Humidity Tray
Fill a shallow tray or saucer with water and place it near your bromeliad. To prevent the plant’s pot from sitting directly in water, you can add a layer of pebbles, marbles, or gravel to the tray. As the water evaporates, it will increase the humidity around the plant. Remember to refill the tray as needed.
Method 3: Group Plants Together
Placing multiple plants close together creates a microclimate with higher humidity. As plants transpire, they release moisture into the air, which benefits neighboring plants. Including other humidity-loving plants in the group can further enhance this effect.
Method 4: Mist the Leaves
Using a spray bottle filled with water, mist the leaves of your bromeliad regularly. This helps maintain humidity directly on the plant’s surface. However, be cautious not to overdo it, as excessive moisture can lead to fungal or bacterial infections. Also, avoid misting in the evening or at night, as this can leave the plant wet for prolonged periods, increasing the risk of diseases.
Method 5: Enclose the Plant
If you’re growing your bromeliad in a terrarium or a closed container, it can help maintain higher humidity levels. Ensure proper ventilation to avoid excessive moisture buildup, which can lead to fungal or bacterial problems.
Common Pests and Problems

Indoor bromeliads are generally easy to care for and not highly susceptible to pests or diseases. However, they can still attract some common pests that may cause harm. Here’s a table that shows how to identify and deal with diseases and pests.
| Pest/Disease | Description | Treatment |
|---|---|---|
| Mealybugs | Small, soft-bodied insects covered in white, powdery wax; feed on plant sap, causing yellowing, wilting, or distortion | 1. Use a cotton swab dipped in rubbing alcohol to remove pests. 2. Repeat as needed. 3. If severe, apply mild insecticidal soap or horticultural oil as per product instructions. |
| Scale insects | Small, immobile pests with protective shell-like covering; feed on plant sap, leading to yellowing and wilting leaves | 1. Manually remove scales using a soft brush, toothpick, or your fingernail. 2. Apply horticultural oil or insecticidal soap as per product instructions, targeting pests and affected areas. 3. Repeat treatment if needed. |
| Fungal infections | Caused by excessive moisture, leading to mold, root rot, or leaf spots | 1. Improve air circulation around the plant. 2. Reduce watering and avoid wetting leaves. 3. Remove affected plant parts. 4. Apply fungicides if necessary, following product guidelines. |
| Bacterial diseases | Caused by excessive moisture, leading to leaf spots, soft rot, or wilt | 1. Remove affected plant parts. 2. Improve air circulation around the plant. 3. Avoid wetting leaves. 4. Reduce watering. 5. Use copper-based bactericides if necessary, following product instructions. |
In Conclusion
Caring for indoor bromeliads is a rewarding experience, and with this ultimate guide, you’ll have all the knowledge you need to ensure your bromeliads thrive.
Remember to pay attention to their light, temperature, and humidity requirements, and keep up with routine care like watering, feeding, pruning, and propagating.
Get to Know Your Bromeliad
| Indicator | Bromeliad (Bromeliaceae) |
|---|---|
| Family | Bromeliaceae |
| Genus | Bromeliad |
| Common Name | Bromeliad, Pineapple Plant |
| Origin | Tropical and subtropical regions of the Americas |
| Plant Type | Evergreen, Epiphytic |
| Mature Size | 1-3 feet (30-90 cm) in height, 1-2 feet (30-60 cm) in spread |
| Growth Rate | Moderate |
| Light Requirements | Low to high, depending on species (filtered or indirect sunlight) |
| Watering Requirements | Fill central “tank” with water; replace weekly |
| Soil Preference | Well-draining, bark-based mix (bark or coconut coir, perlite, peat moss) |
| Temperature Tolerance | 55-90°F (13-32°C), depending on species |
| Humidity Tolerance | Moderate to high humidity (40-60%) |
| Fertilization | Monthly during the growing season, diluted balanced liquid fertilizer |
| Propagation | Pups (offshoots) |
| Pests | Mealybugs, scale insects |
| Diseases | Bacterial or fungal infections (usually due to excessive water in the central tank) |
| Toxicity | Non-toxic to humans and pets |
| Special Features | Unique foliage and stunning flowers, air-purifying |
| Popular Uses | Indoor decoration, tropical gardens, terrariums, hanging baskets |
We hope you found this ultimate guide to indoor bromeliad care and maintenance helpful. If you have any additional tips, experiences, or comments to share, we’d love to hear from you! Please feel free to leave a comment below or share this article with fellow plant enthusiasts.
Your input and expertise will help create a thriving community of indoor gardeners, all dedicated to the joy and beauty of growing bromeliads.
Happy growing!