This article covers the following areas –
- Discovering the Perfect Anthurium: Types, Features, and Selection
- How to Create an Ideal Condition for Your Anthurium?
- Watering Your Anthurium: Striking the Perfect Balance
- How to Ensure Proper Fertilizing for Your Anthurium
- Ensuring Proper Maintenance for Healthy Anthurium
- Propagation Techniques and Tips for Anthurium
- In Conclusion
- Get to Know Your Anthurium
Ever since I brought home my first Anthurium plant, I have been captivated by its vibrant colors and stunning, heart-shaped flowers. As a true plant enthusiast, I couldn’t help but want to learn how to take care of this beautiful plant and make it thrive.
Over time, I’ve honed my skills and learned valuable lessons about Anthurium care. In this comprehensive guide, I’ll share my knowledge and experience so you, too, can easily take the best care of your Anthurium.
Provide bright, indirect sunlight, consistent watering, and high humidity to ensure the best care for your Anthurium plant. Maintain temperatures between 65-85°F, feed with a balanced fertilizer, and prune dead leaves and spent flowers for a healthy, thriving plant.
Wait! We’ve much more to explore! Keep reading the full post to discover detailed advice, expert insights, and helpful tricks to ensure your Anthurium flourishes and thrives.
Discovering the Perfect Anthurium: Types, Features, and Selection
With over 1,000 species of Anthuriums available, it can be overwhelming to pick the perfect one. In this section, I’ll walk you through some of the most popular types of Anthuriums, their unique features, and how to find the one that best suits your preferences and home environment.
Different Anthurium Varieties I Suggest You May Consider
Whether you’re just starting your Anthurium journey or looking to expand your collection, here are 4 captivating Anthurium varieties that I highly recommend. Explore the characteristics of each variety and find the perfect Anthurium to complement your personal style and living space.
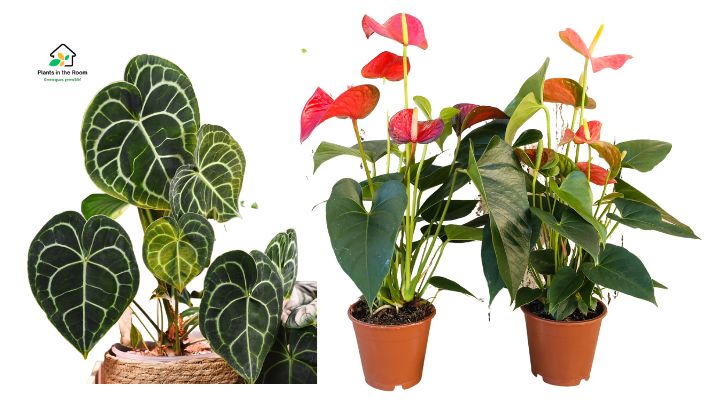
#1 Anthurium andraeanum (Flamingo Flower)

This variety is the most popular and widely available Anthurium. It’s loved for its vibrant, heart-shaped flowers that come in various shades of red, pink, and white. The glossy, deep green leaves provide a perfect backdrop for the stunning flowers, making it an ideal choice for adding a pop of color to your home. This type is relatively easy to care for and blooms throughout the year.
#2 Anthurium clarinervium (Velvet Cardboard Anthurium)

This eye-catching variety boasts large, heart-shaped leaves with striking white veins that create a stunning contrast against the dark green foliage. The Velvet Cardboard Anthurium is a popular choice among collectors for its unique, textured leaves that feel like velvet to the touch. Though it doesn’t produce colorful flowers like the Flamingo Flower, its foliage alone makes it a showstopper.
#3 Anthurium scherzerianum (Pigtail Anthurium)

Pigtail Anthurium is another popular choice for houseplant enthusiasts. This variety is known for its curled, pigtail-like flower spathes. It produces bright, waxy flowers in shades of red, orange, and pink, and its compact size makes it a great option for smaller spaces or as a tabletop plant.
#4 Anthurium veitchii (King Anthurium)

Anthurium veitchii, widely known as King Anthurium, is famous for its elongated, deeply lobed leaves that can grow up to 6 feet long. The King Anthurium is a statement plant, ideal for those with ample space and a desire for a dramatic, tropical look. While it can be a bit more challenging to care for, its captivating foliage makes it well worth the effort.
Tips for Choosing the Right Anthurium
- Assess your space: Before selecting an Anthurium, consider the amount of space you have available, as some varieties can grow quite large. Make sure the plant has enough room to grow and thrive.
- Evaluate your lighting conditions: Anthuriums generally prefer bright, indirect light. Consider your home’s lighting situation and choose a variety that will flourish in the available light.
- Understand the care requirements: Some Anthurium varieties are easier to care for than others. If you’re new to plant care or prefer low-maintenance plants, opt for a more forgiving variety like Anthurium andraeanum.
- Pick a plant that matches your aesthetic: Each Anthurium variety has its unique features and appeal. Choose a plant that complements your home’s décor and aligns with your personal style.
By considering these factors and learning about different Anthurium varieties, you can confidently choose the perfect Anthurium for your home. Embrace the stunning beauty and tropical charm these plants have to offer, and enjoy the rewarding process of nurturing them to full, vibrant health.
How to Create an Ideal Condition for Your Anthurium?
The next step is to create the ideal environment for your Anthurium to flourish. These tropical plants, native to the rainforests of Central and South America, require a specific set of conditions, including temperature, humidity, and lighting.
I’ll share my tried-and-tested tips for maintaining the perfect Anthurium-friendly environment, as well as some creative ways to ensure your plant is happy and healthy.
Temperature
Anthuriums thrive in warm temperatures, typically between 65-85°F (18-30°C) during the day and slightly cooler at night, around 60-65°F (15-18°C).
To maintain a consistent temperature in your home, avoid placing your Anthurium near drafts, air conditioning vents, or heating sources. Sudden temperature fluctuations can cause stress to your plant and may lead to yellowing leaves or poor growth.
Humidity
High humidity is essential for Anthuriums, as they are accustomed to the moist environment of the rainforest. Aim for a humidity level between 60-80%. To increase humidity around your Anthurium, consider these methods:
- Use a humidifier: Placing a humidifier near your Anthurium can help maintain the ideal humidity levels for your plant. Be sure to clean and maintain the humidifier regularly to prevent mold and bacterial growth.
- Group plants together: Grouping your Anthurium with other humidity-loving plants can create a more humid microclimate, as the plants release moisture through a process called transpiration.
- Pebble tray: Fill a shallow tray with pebbles and water, and place your Anthurium’s pot on top of the pebbles, ensuring the bottom of the pot doesn’t touch the water. As the water evaporates, it increases the humidity around the plant.
- Misting: Regularly mist your Anthurium with water, preferably using a spray bottle with a fine mist setting. Be cautious not to overdo it, as excessive moisture on the leaves can lead to fungal infections.
Lighting
Anthuriums prefer bright, indirect light to grow and produce vibrant blooms. Direct sunlight can scorch their leaves, while insufficient light can lead to leggy growth and fewer flowers. Place your Anthurium near a north or east-facing window, or use a sheer curtain to filter sunlight from a south or west-facing window.
If you lack sufficient natural light, consider using artificial lighting, such as LED grow lights, to provide the necessary light for your Anthurium. Ensure the light source is placed at an appropriate distance and follow the manufacturer’s recommendations for optimal results.
Watering Your Anthurium: Striking the Perfect Balance
Watering my Anthurium properly was one of the most crucial aspects of its care. Overwatering and underwatering can both lead to problems, so finding the right balance is essential. In this section, I’ll discuss my personal watering routine and provide guidelines for how often and how much to water your Anthurium.
Assessing the Moisture Level
Before watering your Anthurium, it’s essential to check the moisture level of the soil. Stick your finger about an inch into the soil – if it feels dry, it’s time to water. If it still feels moist, wait another day or two before checking again. Alternatively, you can use a moisture meter to get a more accurate reading of the soil’s moisture level.
Watering Technique
When it’s time to water your Anthurium, water it thoroughly, allowing water to drain freely from the bottom of the pot. This process ensures that the roots are receiving enough water and that excess water isn’t accumulating in the pot, which could lead to root rot.
Watering Frequency
The frequency of watering will depend on several factors, including the size of your Anthurium, the type of potting mix, and the environmental conditions in your home.
Generally, Anthuriums need to be watered about once a week during the growing season (spring and summer) and slightly less frequently during the dormant period (fall and winter). Always check the soil moisture before watering to avoid overwatering or underwatering.
Checking the Signs of Overwatering and Underwatering
Learning to recognize the signs of overwatering and underwatering can help you adjust your watering routine accordingly.
Overwatering Signs
Yellowing leaves, soft stems, and a wilting appearance despite moist soil are common signs of overwatering. To remedy this issue, reduce your watering frequency and ensure your pot has proper drainage.
Underwatering Signs
Brown leaf tips, drooping leaves, and dry soil are indicators that your Anthurium is not receiving enough water. Increase your watering frequency and monitor the soil moisture more closely.
Choosing the Right Pot and Potting Mix

The type of pot and potting mix you use can significantly impact your Anthurium’s watering needs. Choose a well-draining pot with drainage holes and a light, well-aerated potting mix specifically designed for Anthuriums or other tropical plants.
A good potting mix will typically contain peat moss, perlite, or bark to ensure proper drainage and aeration.
How to Ensure Proper Fertilizing for Your Anthurium
Just like us, plants need nutrients to grow and thrive. Through trial and error, I discovered the ideal fertilizing routine and the best type of fertilizer for my Anthurium. In this section, I’ll share my experience and tips on how to feed your Anthurium to ensure it produces vibrant, healthy blooms.
Choosing the Right Fertilizer
When it comes to fertilizing your Anthurium, selecting the right type of fertilizer is crucial. Opt for a balanced, water-soluble fertilizer with a 1:1:1 or 3:1:2 ratio of nitrogen (N), phosphorus (P), and potassium (K), which provides the essential nutrients needed for healthy growth and blooming.
Some gardeners also recommend using a fertilizer specifically formulated for tropical plants or flowering houseplants.
Fertilizing Frequency
During the growing season (spring and summer), fertilize your Anthurium every 4 to 6 weeks. In the dormant period (fall and winter), reduce the frequency to every 8 to 10 weeks. This schedule ensures that your Anthurium receives the nutrients it needs to thrive without over-fertilizing, which can lead to fertilizer burn or excessive growth at the expense of flowering.
Application Method
Follow the manufacturer’s instructions for mixing the fertilizer with water. Be sure to dilute the fertilizer to half or a quarter of the recommended strength to prevent over-fertilizing and potential damage to your plant.
Apply the fertilizer solution while watering your Anthurium, ensuring the nutrients are distributed evenly throughout the soil.
Monitoring Your Anthurium’s Health
Keep an eye on your Anthurium’s growth and appearance to determine if your fertilizing routine is effective. Signs of proper fertilization include healthy, green leaves, robust growth, and vibrant blooms. If your Anthurium appears to be struggling, consider adjusting the fertilizer type, concentration, or frequency to better meet its needs.
Flushing the Soil
Over time, salts from the fertilizer can accumulate in the soil, which may harm your Anthurium roots. To prevent this buildup, periodically flush the soil by running water through it for several minutes. This process will help to wash away excess salts and maintain a healthy root environment.
Ensuring Proper Maintenance for Healthy Anthurium

As my Anthurium grew, I realized the importance of maintaining it to promote healthy growth. In this section, I’ll share my step-by-step guide to pruning your Anthurium, as well as how to spot common issues like yellowing leaves and pests. Plus, I’ll provide tips on how to address these issues and keep your Anthurium looking its best.
Pruning Your Anthurium
Regular pruning helps to maintain your Anthurium’s shape, encourage bushier growth, and remove dead or damaged parts.
- Tools: Use clean, sharp pruning shears or scissors to prevent the spread of diseases and ensure clean cuts.
- Timing: The best time to prune your Anthurium is during the dormant period (fall and winter) or just before the growing season (early spring).
- Process: Begin by removing any dead or yellowing leaves, cutting as close to the base of the stem as possible. Next, trim back any leggy or overly long stems to encourage bushier growth. Finally, remove any spent flowers by cutting the flower stalk at its base.
Regular Maintenance
Consistent care and maintenance are essential to keep your Anthurium looking its best.
- Dusting: Gently wipe the leaves with a damp cloth or soft brush to remove dust and help the plant absorb more light.
- Rotating: Rotate your Anthurium every few weeks to ensure even growth and exposure to sunlight.
- Repotting: Repot your Anthurium every 2-3 years or when it becomes root-bound. Choose a pot that is one size larger than the current one and use fresh, well-draining potting mix.
Troubleshooting Common Anthurium Problems
- Yellowing leaves: This issue can be caused by overwatering, underwatering, or insufficient light. Assess your watering routine and lighting conditions to identify and address the problem.
- Browning leaf tips: Low humidity or underwatering can cause brown leaf tips. Increase humidity using the methods mentioned earlier and ensure you’re watering your Anthurium adequately.
- Pests: Anthuriums can be prone to pests such as aphids, mealybugs, and spider mites. Inspect your plant regularly for signs of infestation. If you discover pests, treat your Anthurium with insecticidal soap or neem oil, following the product instructions.
- Diseases: Overwatering and high humidity can lead to fungal diseases like root rot and leaf spot. Prevent these issues by maintaining proper watering practices and ensuring good air circulation around your plant.
Propagation Techniques and Tips for Anthurium
One of the most rewarding aspects of my Anthurium journey has been propagating new plants from my existing ones. In this section, I’ll explain the various propagation methods and walk you through the process of creating new Anthurium plants for your home or to share with friends and family.
Propagation Method 1: Division
Division is the simplest and most common method for propagating Anthuriums, as it involves separating a mature plant into smaller sections, each with its own roots and foliage.
- Timing: The best time to divide your Anthurium is during repotting, typically every 2-3 years or when the plant becomes root-bound.
- Process: Carefully remove the Anthurium from its pot and gently separate the root ball into smaller sections, each with at least one healthy stem and a well-developed root system. Be cautious not to damage the roots during this process.
- Planting: Place each division into its own pot filled with fresh, well-draining potting mix specifically designed for Anthuriums or tropical plants. Water the divisions thoroughly and place them in a warm, bright spot with indirect light.
Propagation Method 2: Stem Cuttings
Stem cuttings involve taking a healthy stem from your Anthurium and rooting it in water or soil to grow a new plant.
- Timing: The ideal time for taking stem cuttings is during the growing season (spring and summer), when the plant is actively growing.
- Process: Select a healthy, mature stem with at least one leaf and a growth node. Using clean, sharp pruning shears or scissors, make a diagonal cut about 1-2 inches below the node. Remove any lower leaves from the cutting, leaving only the top few leaves.
- Rooting: You can root your cutting in water or directly in soil.
- Water: Place the cutting in a container filled with clean water, ensuring the node is submerged. Change the water every few days to prevent bacterial growth. Once roots have formed (usually within 2-4 weeks), transplant the cutting into a pot with well-draining potting mix.
- Soil: Dip the cut end of the stem in rooting hormone (optional) and plant it in a small pot filled with moist, well-draining potting mix. Cover the pot with a plastic bag or dome to maintain humidity and place it in a warm, bright spot with indirect light. Keep the soil moist, and roots should develop within 4-6 weeks.
After your new Anthurium plants have established themselves, follow the care tips outlined in previous sections to ensure they continue to thrive.
In Conclusion
Caring for my Anthurium has been a labor of love and a source of immense satisfaction. As I’ve nurtured it and watched it grow, I’ve learned valuable lessons about patience, attentiveness, and the beauty of nature. I’ve witnessed firsthand how these stunning plants can transform a space, adding a touch of elegance and tropical charm to any room.
I hope that by sharing my experience and insights, you will find joy in taking the best care of your Anthurium.
Get to Know Your Anthurium
| Indicator | Anthurium (Anthurium andraeanum) |
|---|---|
| Family | Araceae |
| Genus | Anthurium |
| Common Name | Flamingo Flower, Tailflower, Painter’s Palette |
| Origin | Tropical regions of Central and South America |
| Plant Type | Evergreen, Herbaceous |
| Mature Size | 1-2 feet (30-60 cm) in height, 1-2 feet (30-60 cm) in spread |
| Growth Rate | Moderate |
| Light Requirements | Medium to high, Bright, Indirect Light |
| Watering Requirements | Keep soil evenly moist, Do not allow to sit in water |
| Soil Preference | Well-draining, Peat-based mix |
| Temperature Tolerance | 65-85°F (18-27°C) |
| Humidity Tolerance | High Humidity (60-80%) |
| Fertilization | Every 4-6 weeks during the growing season, Balanced liquid fertilizer |
| Propagation | Stem Cuttings, Division |
| Pests | Aphids, Mealybugs, Spider Mites, Thrips |
| Diseases | Bacterial Blight, Fungal Diseases, Root Rot |
| Toxicity | Toxic to humans and pets (due to calcium oxalate crystals) |
| Special Features | Attractive, Long-lasting Flowers, Air-purifying |
| Popular Uses | Indoor Decoration, Tropical Gardens, Cut Flowers |