This article covers the following areas –
- Light Requirements: Finding the Best Spot
- Watering Techniques: Misting vs. Soaking
- Air Circulation and Humidity: Creating the Perfect Environment
- Choosing the Right Container: Pots, Terrariums, and Mounts
- Fertilization: How Often and What Type of Fertilizer to Use
- Propagation Methods: Dividing Pups vs. Growing from Seed
- Common Pests and Diseases: How to Identify and Treat
- Air Plants Maintenance: Grooming and Pruning Tips
- In Conclusion
- Get to Know Your Air Plant
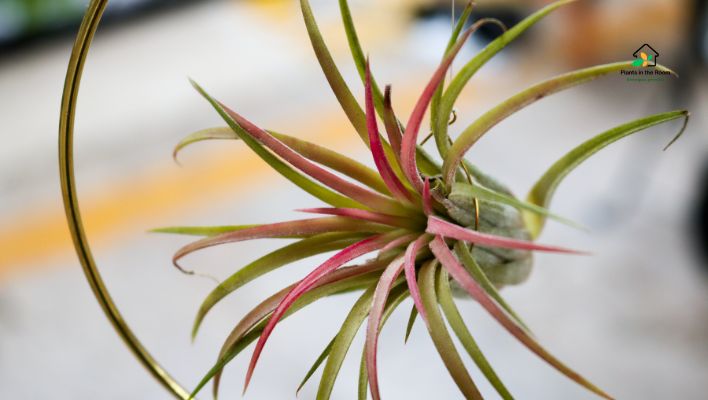
Air plants, also known as Tillandsias, are incredibly unique and easy-to-care-for plants that make wonderful additions to any home. In this article, I’ll be sharing a complete guide to your air plant care, from the basics of their biology to the specifics of their watering, lighting needs, feeding, and almost everything.
Air plants are low-maintenance but require bright, indirect light, moderate watering, and proper air circulation. Fertilize lightly every 2-3 months, and trim dead leaves. Avoid overwatering and protect from pests and disease.
These are just a few key tips to get you started with caring for your air plants. Keep reading to learn more about choosing the right container, preventing overwatering and root rot, and more.
Light Requirements: Finding the Best Spot
Air plants are native to tropical and subtropical regions of the Americas and are adapted to growing in bright, indirect light. While they can tolerate some direct sunlight, prolonged exposure to direct sunlight can damage their leaves and cause them to dry out. Therefore, it is important to find the right balance of light and shade when choosing a spot for your air plants.
Choosing a Location with Natural Light
When selecting a location for your air plants, consider the amount of natural light that is available in your home or office. The ideal spot for your air plants is near a window that receives bright, indirect light for a few hours each day.
East or west-facing windows are typically the best for air plants, as they provide plenty of light without exposing the plants to too much direct sunlight.
Using Artificial Light for Air Plants If necessary
If you don’t have access to natural light, you can still successfully grow air plants by using artificial light. Fluorescent lights are a good choice for air plants, as it emits the right spectrum of light for their needs.
Position the light about 12-18 inches away from your air plants and leave it on for about 12-16 hours each day. Be sure to turn off the light at night to allow your air plants to rest.
Understanding Species-Specific Light Needs
Keep in mind that different species of air plants have different light requirements, and some may tolerate more or less light than others. Some species, such as Tillandsia bulbosa, require more shade than others, while others, such as Tillandsia ionantha, can tolerate more direct sunlight.
Be sure to research the specific light requirements of your air plant species and adjust their location or lighting accordingly.
Watering Techniques: Misting vs. Soaking
Air plants are epiphytes, which means that they grow without soil and obtain their moisture and nutrients from the air around them. As a result, proper watering is essential to their survival and health.
While air plants don’t require as much water as traditional potted plants, they still need to be watered regularly to keep them hydrated and nourished.
Misting Technique for Watering Air Plants
The two most common watering techniques for air plants are misting and soaking. Misting involves using a spray bottle to mist your air plants with water. This technique is best for smaller air plants or those that are in a dry environment.
As misting is gentle watering, it allows your air plants to absorb moisture without getting soaked. It also helps to remove any dust or debris from the leaves, which can block the plant’s ability to absorb moisture and nutrients from the air.
Soaking Technique for Watering Air Plants
Soaking involves submerging your air plants in water for about 30 minutes. This technique is best for larger air plants or those that are in a humid environment. Soaking provides a more thorough watering, allowing the plant to absorb moisture from all sides.
After soaking, be sure to shake off any excess water and let the plant dry completely before returning it to its container. This will help prevent water from collecting in the base of the plant, which can lead to rot.
What Is the Right Water for Your Air Plants?
When watering your air plants, it’s important to use room-temperature water that is free of chlorine, fluoride, and other chemicals that can harm your plants. Rainwater, distilled water, or water that has been left out overnight is ideal.
Do not use softened or hard water, as the minerals in these types of water can build up on the leaves and prevent the plant from absorbing moisture and nutrients.
What Should Be the Ideal Watering Frequency for Air Plants?
The frequency of watering your air plants will depend on a variety of factors, including the size and species of the plant, the humidity level in your home or office, and the amount of light it receives. As a general rule, you should water your air plants about once a week. However, if your air plants are in a dry environment or receive more light, you may need to water them more frequently.
Air Circulation and Humidity: Creating the Perfect Environment

Air plants are adapted to growing in tropical and subtropical regions with high humidity levels. In order to thrive, they need a humid environment with good air circulation. This helps them absorb moisture and nutrients from the air around them and allows them to breathe properly.
However, too much humidity can also lead to issues with mold or rot, so it’s important to find the right balance for your air plants.
How to Ensure Good Air Circulation for Healthy Air Plants?
To create the perfect environment for your air plants, start by placing them in a room with good air circulation. This will help prevent stagnant air from building up around your plants and improve their overall health. You can achieve good air circulation by placing a small fan in the room or opening windows and doors to allow fresh air to flow through.
How to Maintain Ideal Humidity Level for Your Air Plants?
Air plants also require a certain level of humidity to thrive. The ideal humidity level for air plants is between 50-70%. If the humidity in your home or office is too low, you can increase it by using a humidifier or placing a tray of water near your air plants. You can also group your air plants together to create a microclimate with higher humidity levels.
How to Prevent Mold and Rot in Your Air Plants?
It’s important to be careful not to create too much humidity around your air plants, as this can lead to issues with mold or rot. Make sure that there is adequate air circulation around your plants and that they are not placed in a location where water can collect and stagnate.
If you notice any signs of mold or rot on your air plants, such as dark or mushy spots on the leaves, remove the affected areas immediately and adjust the humidity level in your environment.
Choosing the Right Container: Pots, Terrariums, and Mounts

Air plants are unique in that they can be grown in a variety of containers, making them versatile and fun plants to care for. When choosing a container for your air plants, there are a few things to keep in mind to ensure that your plants thrive.
1) Pots
Pots are a popular choice for growing air plants, as they provide stability and a traditional planting environment. When choosing a pot, make sure it has drainage holes to prevent overwatering and root rot. Also, choose a pot that is the appropriate size for your air plant, as plants that are too small or too large for their pots can become stressed or overcrowded.
2) Terrariums
Terrariums are another popular container for air plants, as they create a humid environment that mimics the plants’ natural habitat. When choosing a terrarium, make sure it has proper ventilation to prevent mold or fungal growth.
Additionally, choose a terrarium that is the appropriate size for your air plant and consider adding a layer of pebbles or charcoal to the bottom for drainage.
3) Mounts
Mounts are a great option for air plants as they provide good air circulation and allow the plant to grow in a more natural way. Mounts can be made from a variety of materials, including wood, cork, or wire. When choosing a mount, make sure it is the appropriate size for your air plant and that it has a secure attachment point.
Fertilization: How Often and What Type of Fertilizer to Use
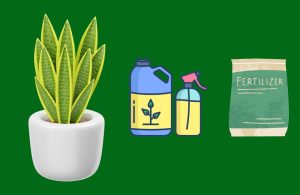
Air plants are unique in that they absorb their nutrients and moisture directly from the air around them. While they don’t require fertilizer as frequently as potted plants, they can benefit from an occasional nutrient boost to help them grow and stay healthy.
There are two main types of fertilizers that are commonly used for air plants: specialized air plant fertilizers and general-purpose liquid fertilizers.
Using Specialized Air Plant Fertilizers
Specialized air plant fertilizers are designed specifically for the needs of air plants, and often contain a blend of macro and micronutrients that are essential for their growth and development. When using a specialized air plant fertilizer, follow the instructions on the label for the recommended frequency and amount of fertilizer to use.
In general, it’s best to fertilize your air plants once a month during the growing season, which typically runs from spring to fall. Reduce or stop fertilizing during the winter months when your air plants are in a state of dormancy.
Using General-Purpose Liquid Fertilizers for Air Plants
General-purpose liquid fertilizers can also be used on air plants but should be diluted to half-strength. Then apply that half-strength fertilizer to your air plants using a spray bottle or by soaking them in a solution of water and fertilizer. Avoid applying fertilizer directly to the base of your air plants, as this can lead to root burn and damage to the plant.
Avoiding Over-Fertilization and Potential Issues
Over-fertilizing can be harmful to your air plants and can lead to issues such as burnt leaves or stunted growth. If you notice any signs of fertilizer burn, such as brown or yellow spots on the leaves, reduce the amount of fertilizer you’re using or stop fertilizing altogether for a period of time.
Propagation Methods: Dividing Pups vs. Growing from Seed
One of the great things about air plants is that they are easy to propagate, making it simple to increase your collection or share with friends. There are two main methods of propagation for air plants: division of pups and growing from seed.
Propagating Air Plants Through Division of Pups
Division of pups is the most common and easiest method of propagating air plants. Pups are smaller plants that grow off the main plant and can be removed and grown on their own. To propagate your air plants through the division of pups, wait for the pups to grow to at least one-third the size of the parent plant.
This typically takes several months, depending on the species and growing conditions. Once the pups have reached the appropriate size, gently twist or cut them off with a clean pair of scissors. Be sure to leave a small portion of the base of the pup attached to the parent plant to prevent damage.
You can then pot the pups in their own containers or attach them to a mount or other surface using wire or glue. Be sure to provide the same care and conditions for the pups as you would for the parent plant.
Growing Air Plants from Seed
Growing air plants from seed is another option, although this method is more time consuming and requires more patience. To grow air plants from seed, start by collecting the seeds from the parent plant.
Allow the seeds to dry out for a few days, then sow them in well-draining soil or on a suitable mount. Keep the soil or mount moist and place the seeds in a warm, bright location with good air circulation.
It may take several months for the seeds to germinate and grow into small plants. As the plants grow, provide the same care and conditions as you would for mature air plants.
Common Pests and Diseases: How to Identify and Treat

Air plants are generally low-maintenance and easy to care for, but they can still be susceptible to common pests and diseases if their needs aren’t being met. The most common issues that air plants face are mealybugs, scale insects, mites, and rotting.
Treating Mealybugs in Air Plants
Mealybugs are small, white, cotton-like insects that can infest the leaves and base of your air plants. They can cause the leaves to curl and turn yellow and can also lead to mold or fungal growth.
To treat mealybugs, identify the affected areas and remove them with a clean pair of scissors. You can also use a cotton swab or spray bottle to apply rubbing alcohol directly to the mealybugs. Repeat this process every few days until the mealybugs are gone.
Dealing with Scale Insects in Air Plants
Scale insects are another common pest that can infest air plants. They are small, brown or black insects that attach themselves to the leaves and base of your plants. They can cause the leaves to yellow and fall off and can also lead to mold or fungal growth.
To treat scale insects, identify the affected areas and remove them with a clean pair of scissors. You can also use insecticidal soap or horticultural oil to suffocate and kill the insects.
Be sure to follow the instructions on the label carefully, as these products can be harmful to your plants if used incorrectly.
Addressing Mite Infestations in Air Plants
Mites are another common pest that can infest air plants. They are tiny, spider-like insects that can cause the leaves to curl and turn yellow.
To treat mites, identify the affected areas and remove them with a clean pair of scissors. You can also use a spray bottle to apply a mixture of water and dish soap directly to the affected areas. Repeat this process every few days until the mites are gone.
Identifying and Treating Rot in Air Plants
Rotting is a common issue that air plants can face if they are overwatered or don’t have proper drainage. Signs of rotting include soft or mushy leaves, a foul odor, and a discolored base.
To treat rotting, identify the affected areas and remove them with a clean pair of scissors. You can also adjust your watering habits and ensure that your air plants have proper drainage to prevent further issues with rotting.
Air Plants Maintenance: Grooming and Pruning Tips

While air plants are known for being low-maintenance, they still require some grooming and pruning to keep them looking healthy and vibrant. Here are some tips for grooming and pruning your air plants:
#1 Remove Dead or Damaged Leaves of Your Air Plants
It’s important to remove any dead or damaged leaves from your air plants as soon as you notice them. Dead or damaged leaves can attract pests or lead to issues with mold or fungal growth.
To remove a dead or damaged leaf, gently pull it away from the plant at the base. If the leaf is still partially green, you can trim away the dead portion using a clean pair of scissors.
#2 Trim the Ends of the Leaves of Your Air Plants
Over time, the ends of the leaves on your air plants may become dry or brown. Trimming the ends of the leaves can help keep your air plants looking tidy and healthy.
To trim the ends of the leaves, use a clean pair of scissors to make a straight cut across the end of the leaf. Be sure to only trim away the dry or brown portion of the leaf, and avoid cutting into the green portion.
#3 Groom and Prun Your Air Plants
Depending on the size and shape of your air plants, there may be additional grooming and pruning techniques that can help keep them looking their best.
For example, if your air plant has long, trailing leaves, you may want to gently curl the ends of the leaves to create a more sculptural effect. If your air plant has a more compact shape, you may want to trim away any leaves that are blocking the overall shape of the plant.
In Conclusion
Air plants are unique and easy to care for plants that can add a touch of greenery to any living space. With a little bit of knowledge and care, you can keep your air plants happy and healthy for years to come.
Remember to mist or soak them regularly, place them in bright, indirect light, and keep them in a warm, humid environment. And if you run into any issues, don’t worry – there’s always a solution.
Happy air plant growing!
Get to Know Your Air Plant
| Indicator | Air Plant (Tillandsia) |
|---|---|
| Family | Bromeliaceae |
| Genus | Tillandsia |
| Common Name | Air Plant |
| Origin | Tropical and subtropical regions of the Americas |
| Plant Type | Epiphyte |
| Mature Size | Varies, from a few inches to several feet |
| Growth Rate | Slow to moderate |
| Light Requirements | Medium to high, Bright, Indirect Light |
| Watering Requirements | Misting or Soaking, Depending on Humidity Levels |
| Soil Preference | Absorbs water and nutrients from the air, No soil required |
| Temperature Tolerance | 50-90°F (10-32°C) |
| Humidity Tolerance | High Humidity (50-70%) |
| Fertilization | Occasional, Every 1-2 Months |
| Propagation | Offsets or Pups |
| Pests | None, Occasionally Mealybugs or Scale Insects |
| Diseases | Rotting if Overwatered, Fungal Diseases |
| Toxicity | Non-toxic to humans and pets |
| Special Features | Unique Appearance, Easy to Grow |
| Popular Uses | Indoor Decoration, Wall Art, Hanging Plant |